
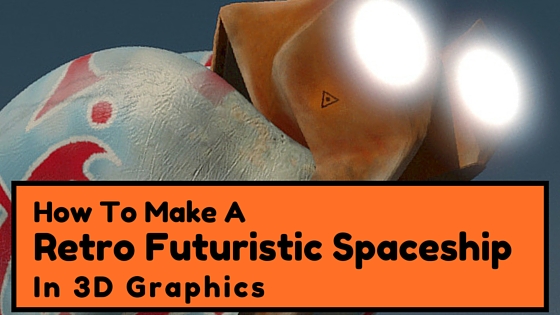
Make A Retrofuturistic Spaceship In 3D Graphics
Make This Retrofuturistic Spaceship
Do you want to make a retrofuturistic spaceship?
retro futuristic spacepod
I love them, especially those retro futuristic ones, I guess it is from my youth in the 80s and 90s. A lot of people who work in 3D are fed up with seeing spaceships. I kind of know what they mean but if you look at older retro illustrations there is some gold out there the domain of retrofuturistic spaceship.
As you know if you read another post on this blog, I like retrofuturism especially from the 70s, that curvy organic but sometimes block style that could also be found in the architecture of the time. In those days, I feel that for science fiction art people thought about the design principles behind their creations. Whereas today, the approach is more formulaic in films and computer games. Compare the immense believability in the designs of visionary futuristic designers such as Syd Mead and Douglas Trumbull with the a more formulaic approaches of many films of today.
In this post, I’m going to show you the main concepts how I made this retrofuturistic spaceship in 3D graphics.
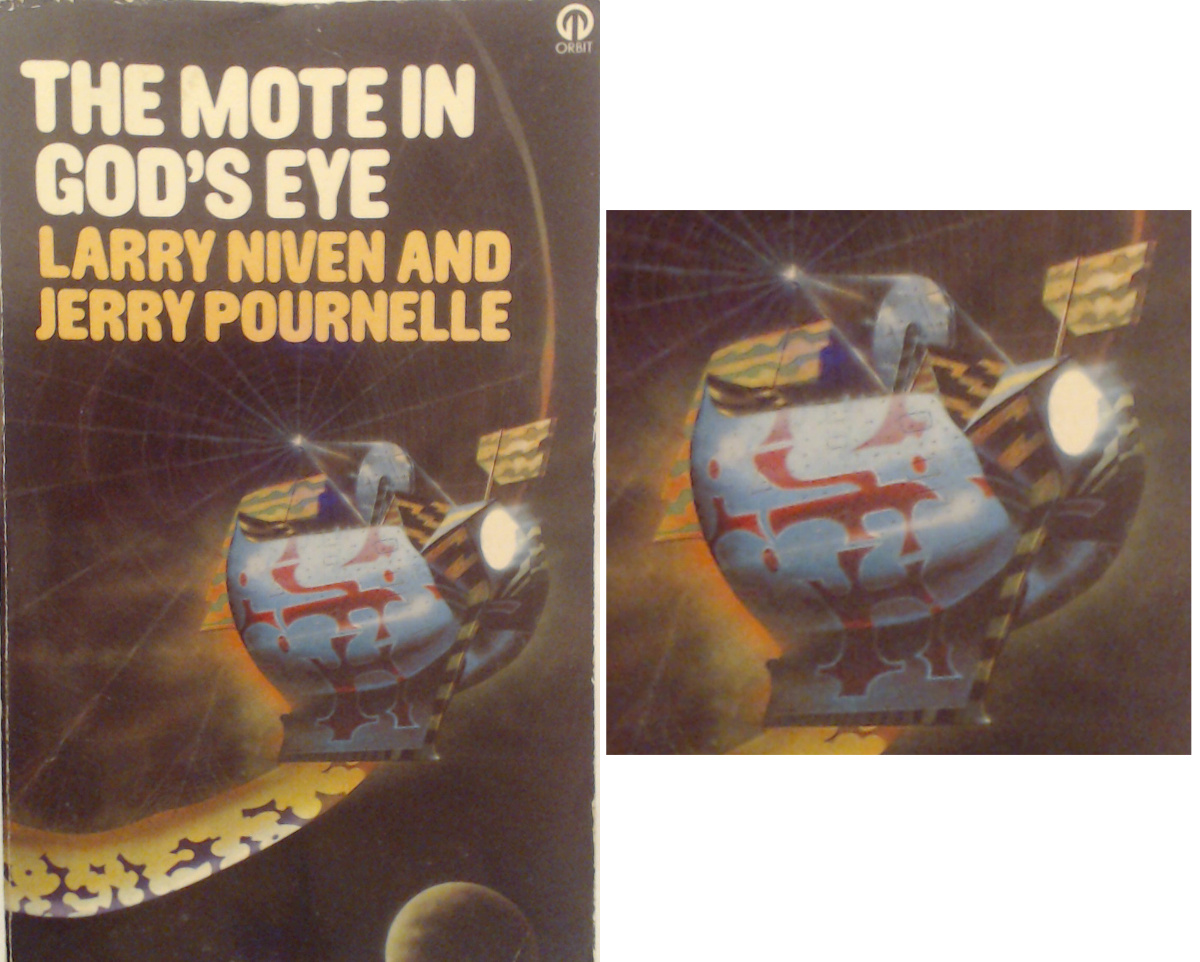
I usually design my own things for my art. This time however, I wanted to give myself a challenge to convert a really cool looking spaceship from a cover of an old science fiction book in my collection. That book is “The Mote In God’s Eye” by Larry Niven and Jerry Pournelle. Unfortunately, the book is in storage and I cannot get to it at the moment so I cannot credit the illustrator, please let me know if you know!
I have an idea for future project to use these ships in art and 3d prints so sign up to my newsletter at the bottom of this page for more updates and also the vlog that goes with this blog post. The great thing about it is that it is now a “product” and can be used for many project in 2D and also in real life installations using 3D printing!
I will take you through the main concepts in how I made this so that it will give you ideas and inspiration for you to make your own retrofuturistic ships, or whatever you want to make!
Step 1 – Source Material
For this source material, I chose the book cover, see the image above. If you want to do the same, you could find a spaceship that you like on a book cover, illustration etc.
The next step was to “get my head around” the retrofuturistic s-paceship form. The illustration was not entirely clear so to make sure my 3D graphics strategy, I sketched out some rough “working out drawings”.
I prefer to do this old school, with paper and pen as I prefer traditional drawing and also it is easier to refer to when modelling the shape on your computer screen.
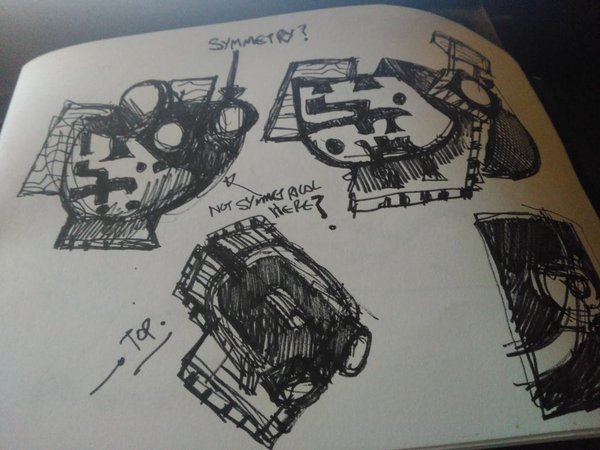
sketching to understand the shape
Step 2 – Work Out 3D Workflow
Before I started, I thought about the 3D Graphics tools that I would use. Here I went for –
Zbrush – For the blue shell organic shape. Zbrush has total control for brush sculpting in 3D graphics especially for organic shapes. It is also very powerful for texture painting.
Blender – I decided to model the block shapes initially in Blender. 3DS Max is more powerful for modelling. The only real reason was to keep honing my modelling skills in Blender as I often teach workshops with this application.
3dsmax – I then took all the parts to this application for a final render.
Finally, the great online application Sketchfab was used (see below) in order to show the final result in interactive 3D on this web page!
If you use other tools, don’t let this put you off. I am showing you the concept of the process, not the minute technical details. Remember to grasp the important concepts, and you will find that you can cross to other 3D applications a lot more easily.
Step 3 – Modelling
To start with, I created a cube in Blender and then proceeded to extrude / move and scale all the elements so that in increments, the retrofuturistic spaceship parts began to take shape.
As I always tell people I am tutoring with 3d graphics, start with a simple model then build up, save incrementally so if you make a mistake or don’t like the way it is going, you can then go back…
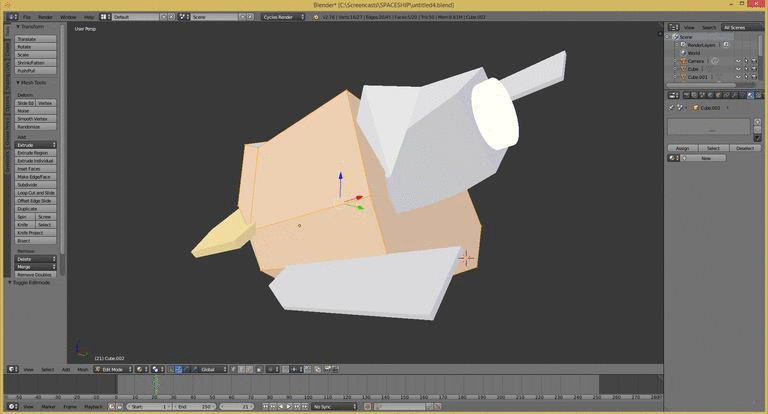
3D modelling in Blender
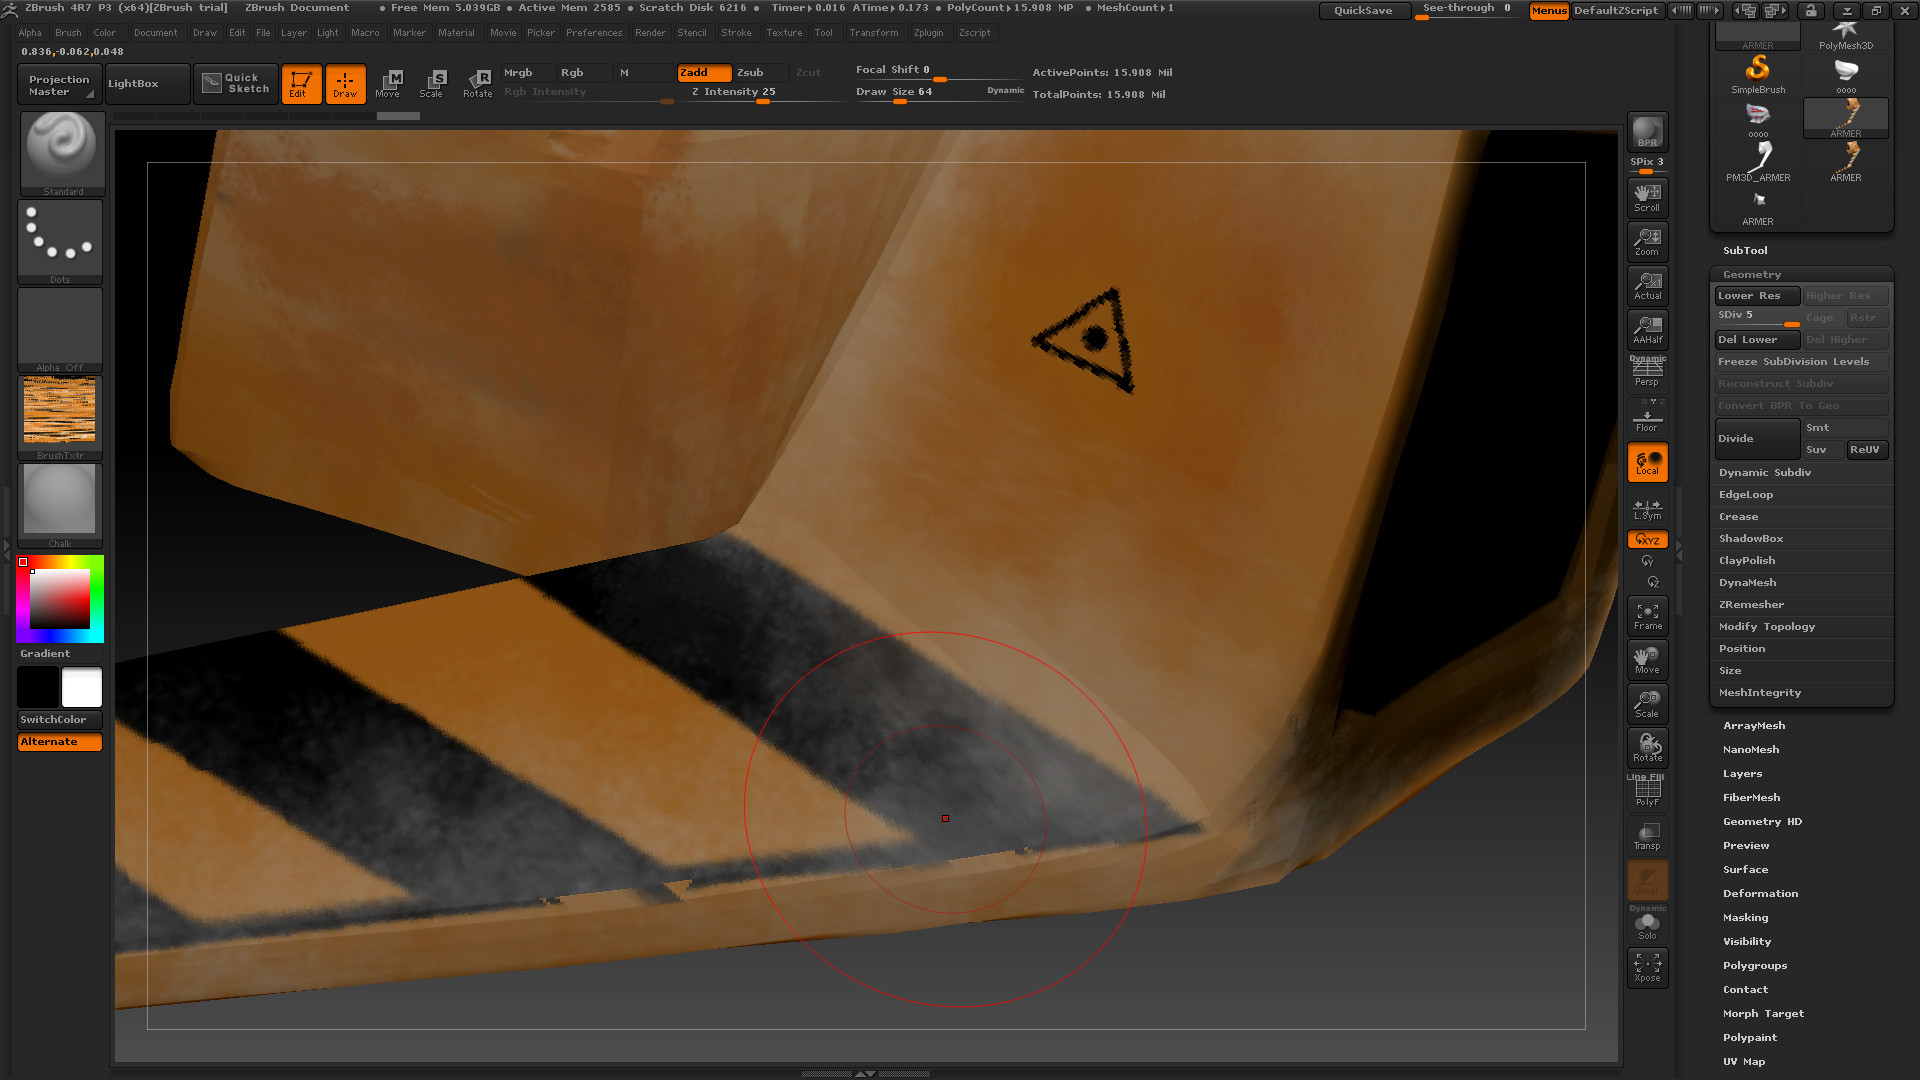
As well as the blocky parts. The shell was really organic. For that reason, I decided to use Zbrush, where I could make and texture organic models with a lot of control and precision without too much of a laborious process.
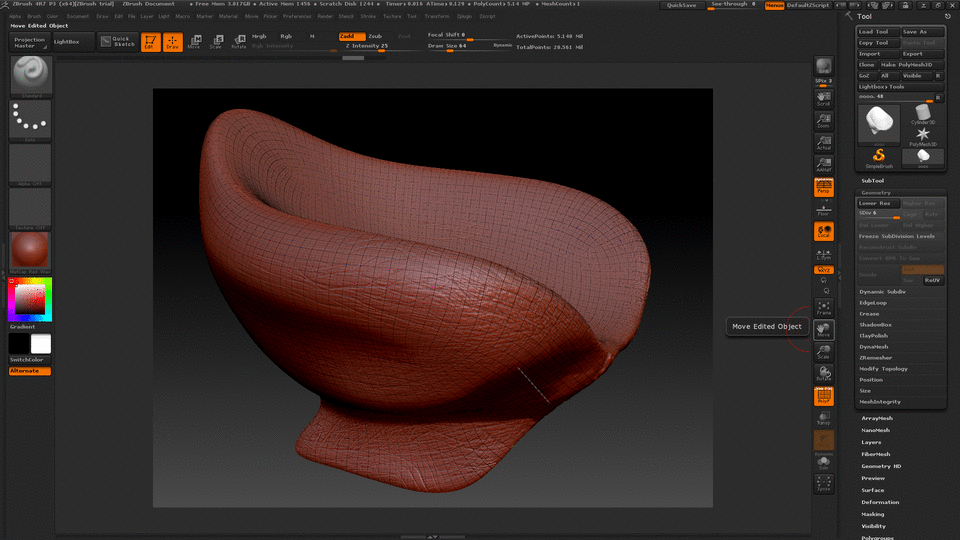
Organic Modelling Zbrush
You can see from the animated gif above, that the model can be “subdivided” so you can work on it with different levels of polygon details. I went through a process of switching into different polygon levels and using sculpting brushes with a symmetry lock (means that any sculpting is mirrored on the other side of the model automatically) a lot to get the shape as close as I could to the illustration from the book cover. I also used the “move” brush a lot which is great for quickly pushing and pulling the shape around.
When sculpting a model in whatever application you use, make sure that you keep in mind the overall shape. Go with the organic flow of the shape. Look at how the different areas relate to the whole. For example, in this model, how much does the extruding “blade” at the bottom stick out, what angle should it be and how does it look compared to the shape of the whole?
If you take this approach, then your models will have more “believability” about them, if you are making your own retrofuturistic spaceship then this is important.
Don’t worry if you don’t have Zbrush. Blender for, example has some pretty powerful sculpting tools, especially when we remember that it is a free application!
Step 4 – Texturing And Materials
When I was happy with the overall shape. I then proceeded to texture. Again, I decided to go the painting route and used Zbrush to paint the textures on. Again, this is a good application to use and the UV mapping system basically works in an instant, unlike other applications where the UV mapping can drive you just totally crazy!
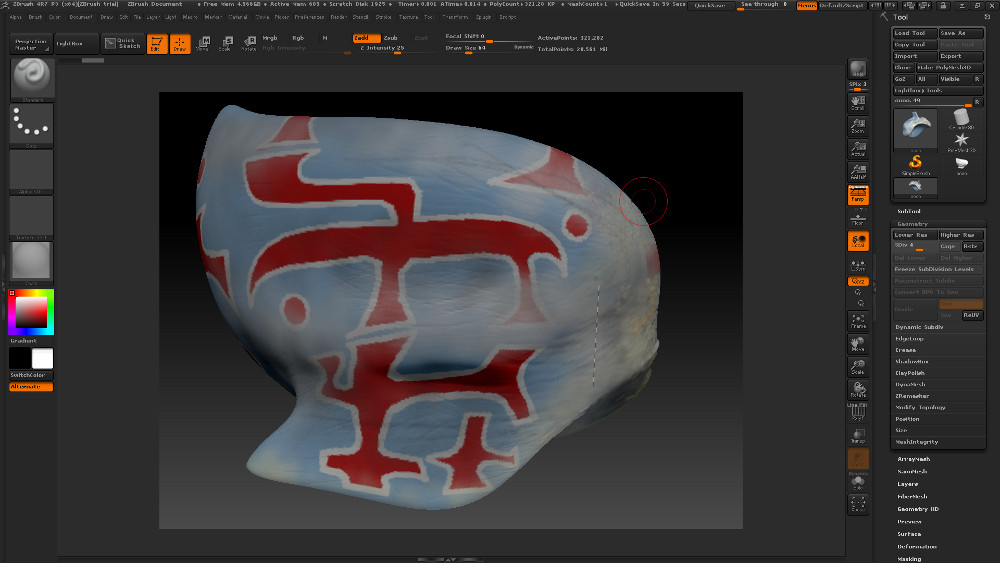
texture paint space pod Zbrush
texture paint zbrush
zbrush paint detail
As well as painting general texture details, I also developed the materials. I imported them into 3DS Max in an fbx file format, then applied the textures onto metal materials in the Mentalray renderer system along with specular maps and normal maps (for scratches on the shell) I left it at that.
Don’t Get Too Precious! It is important to mention here along with the general modelling of the retrofuturistic spaceship, don’t let it consume you too much. Don’t worry about it being “perfect” get it made, get it done. This is the way I believe one improves, not spending too long on technicalities with a project.
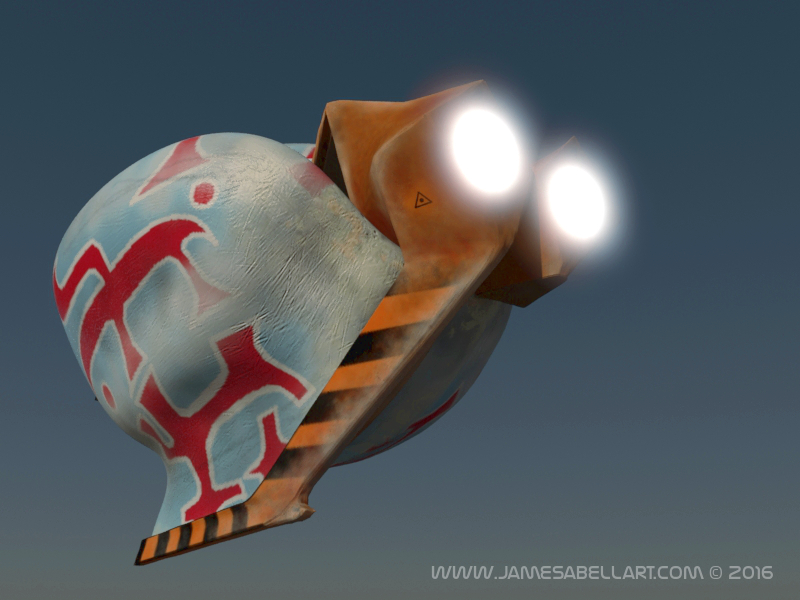
Step 5 – Render The Retrofuturistic Spaceship
Here, I was thinking of making you a lavish cloud scene with this pod spaceship descending from the clouds. Well, it’s late tonight and I will save that kind of thing when I use this in an art piece at a later date!
However, you can get things to look fairly nice, here is a very quick render setup using the daylight system. 1. Setup the daylight system. 2. Make sure you have the environment exposure settings setup for Mentalray or you are going to get a whole lot of white!
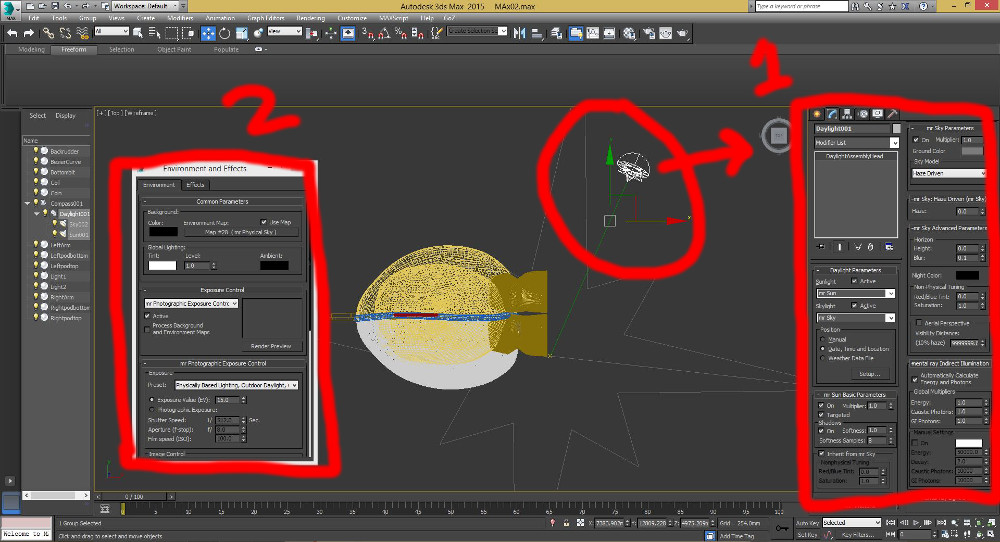
daylight system setup in 3ds Max
If you are using another 3D application, there are similar nice daylight setups such as in Blender, check out this YouTube video I made about this.
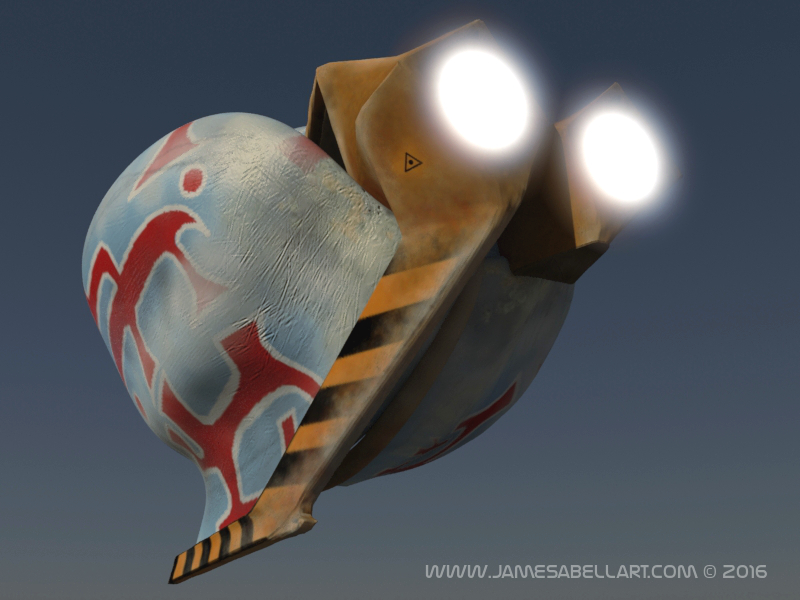
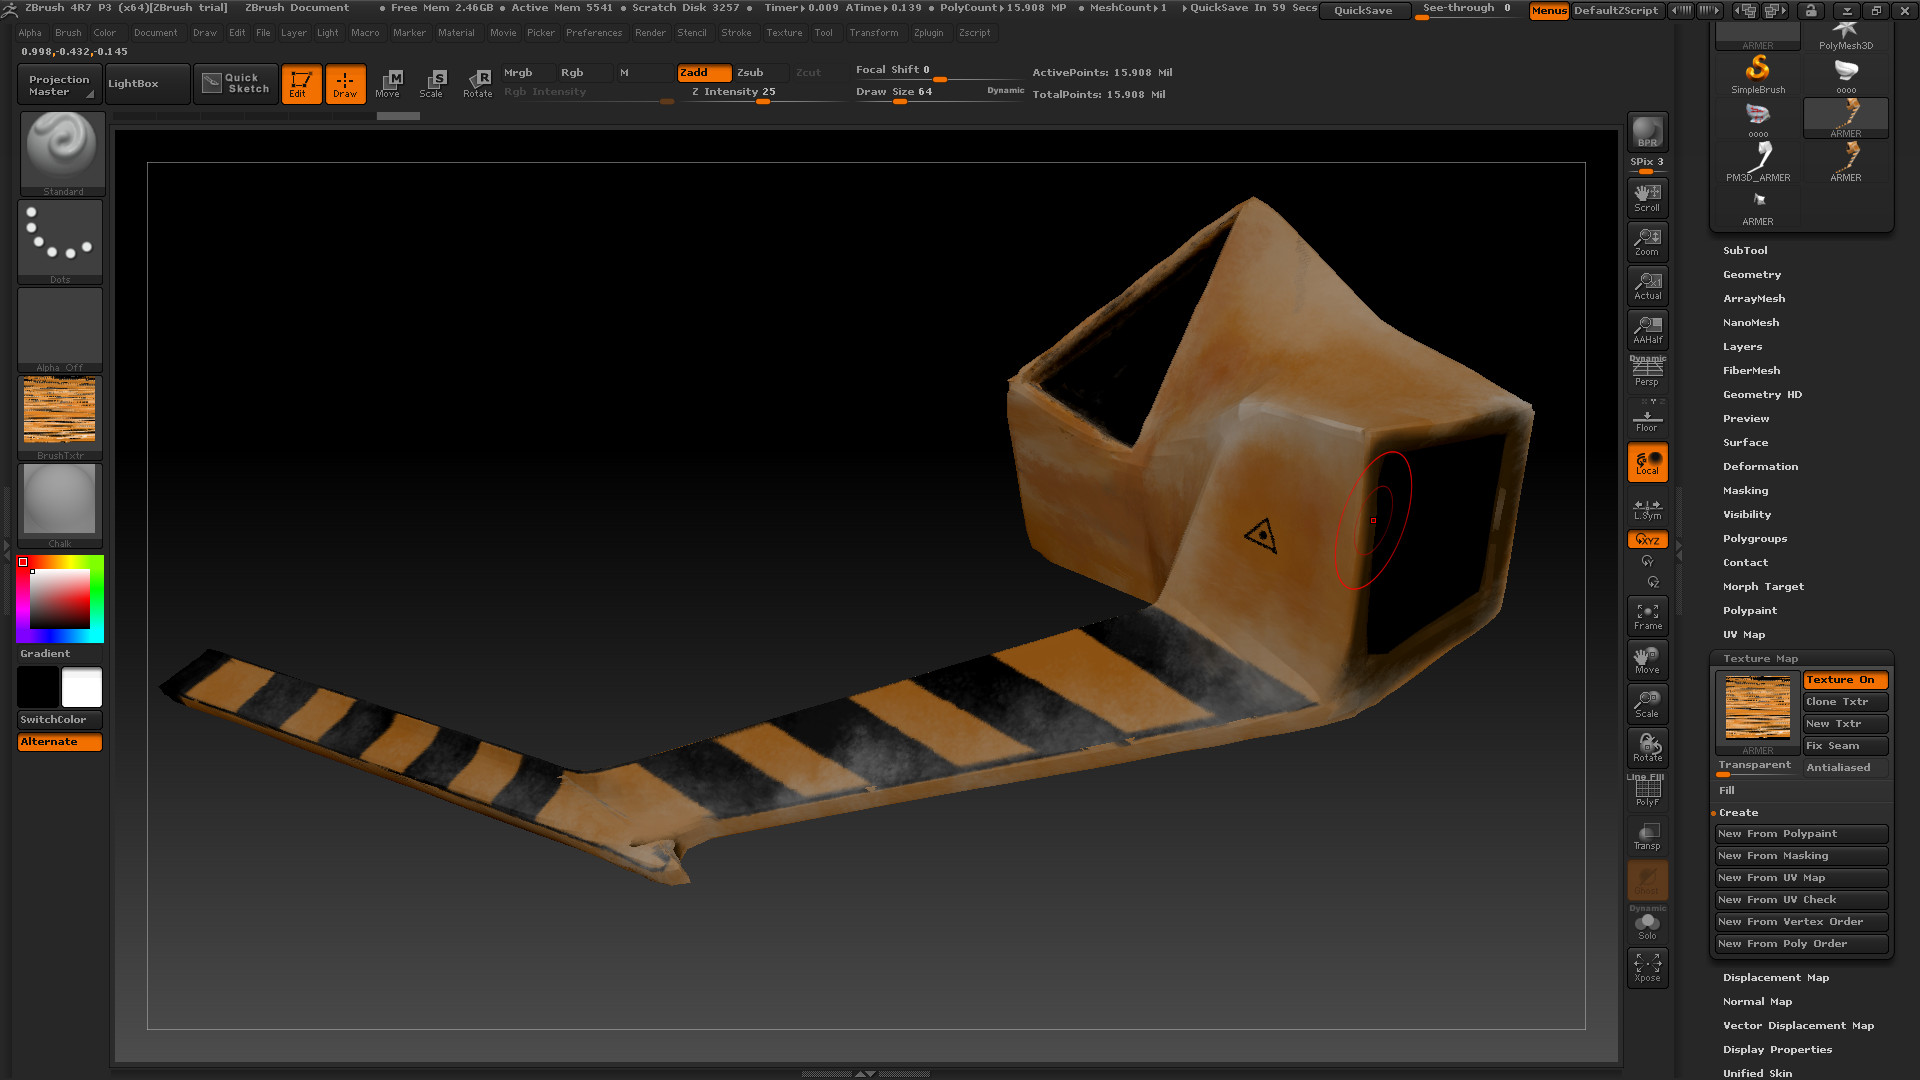
space pod
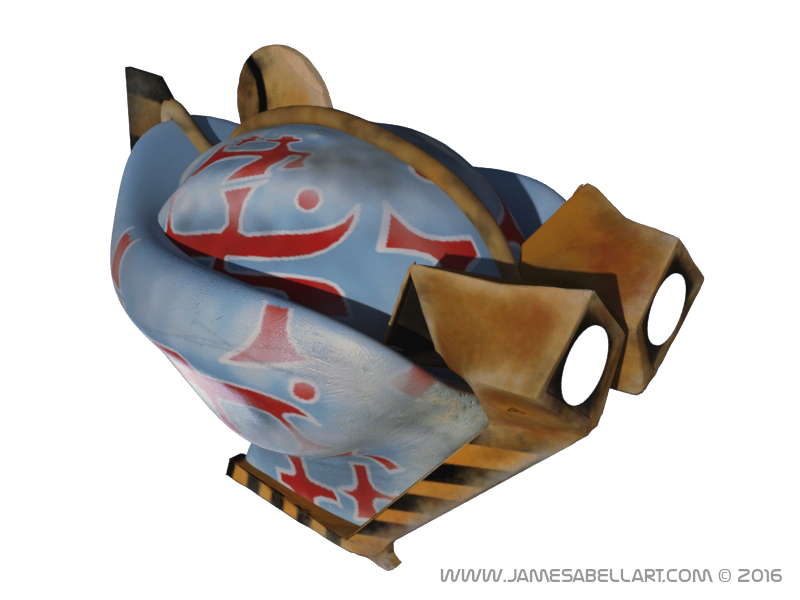
space pod white
Step 6 – The Final Kahuna
I completely misused the word Kahuna here but it sounded kind of good here. Yes? No? Whatever?
I really love this 3D online viewing application Sketchfab. Check it out below. If you want to show off your 3D models online in an interactive way. I would use this!
Chicken Coin Spacecraft
by jamesfuture3d
on Sketchfab
So let me know if this post helps. I always like feedback. In future posts, I will tell you how I make a 3D print of the spaceship. Check out the vlog screencast below where I talk a bit more about the model and the process…
Step 7 – Vlogcast About This = Watch! 🙂
Coming Soon
If you liked reading how I made this spaceship and want to see a similar process for a different style retrofuturistic ship. Then check this blog out soon for the making of this large spaceship below and also texturing of it too! Also, while you are here check out this Futuristic Highland Cow I put onto Sketchfab too.
Long Ship Retro-futuristic Spaceship
by jamesfuture3d
on Sketchfab
If you feel that the resources have helped you and you would like to donate some money to me please do. Donations help me to continue making more resources.
Thanks again and speak soon! Remember to get more stuff like this sign up to my newsletter below. To get one to one tutorials on skype or to request for me to do a workshop contact me at info@jamesabellart.com
