
Make Patterns For A Lasercutter Using Blender Part 1
Make Patterns For A Lasercutter Using Blender
Futuristic Patterns
Firstly, if you do not know what a laser cutter is then go to this link!
Unless you are really rich or dedicated, you probably don’t want to buy a lasercutter just yet! You can find a laser cutter in your local FabLab or Makerspace. It is an expensive tool! Mind you, much like 3D Printing, the machines are getting cheaper by the year, hour or even second 🙂
The laser cutter is one of the most versatile machines in the “maker” toolset, many people when they first experience it at their local FabLab or Makerspace.
The laser cutter will cut different materials such as hardwood, image. cardboard, plastics etc. It will also etch surfaces. image. When you know how to make patterns, you will be able to create some awesome art and design using the laser cutter.
I’m going to show you how to make patterns for a laser cutter using Blender. The pattern I will make is for my soon to be released book, sign up to my newsletter at the bottom of this page to get notification on its release.
Wonderful Patterns
To make this cool pattern, I will be using the free 3D graphics application Blender . You can use other software, such as 2d applications and other 3d applications too. I will then show you how to make sure that the lasercutter will “read” the design using another free application popular with most FabLabs and Makerspaces, Inkscape .
In the next blog post or “part 2” I will show you how to set your pattern up on the lasercutter. I will also take photos of the process! So be sure to check out the post next week.
This work is part of my latest book “How To Design Cities Of The Imagination, Using Maker Technologies” released in a few weeks from now. Subscribe to my newsletter at the bottom of this post to get immediate notification of its release.
How To Make The Pattern
Check out this video below. If you like still images, just scroll down and see the images that outline this process too…
This process require you to know to some extent Blender. If you know another 3D application such as 3DSMax you can use similar principles. You can also make similar patterns in a 2D application such as Photoshop. However, I like to approach things from a 3D perspective!
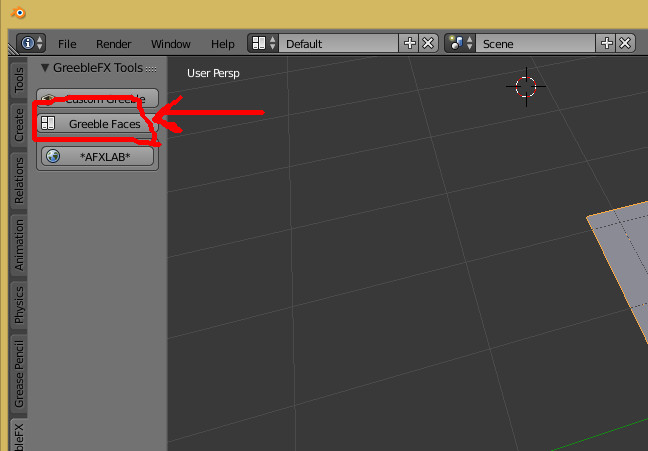
Open Blender make sure you have installed the Greeble FX addon, to download and install it click here.

greeble fx activation blender
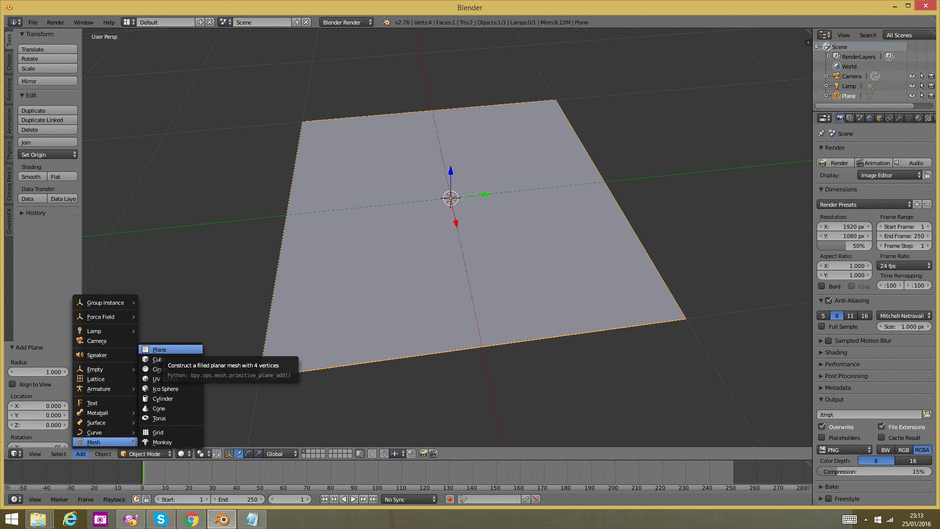
Then make a plane as in the gif animation below. Go into Edit Mode and Ctrl+R and mouse wheel divides equal sections. Do again on other axis.
greeble fx blender
greeblefx
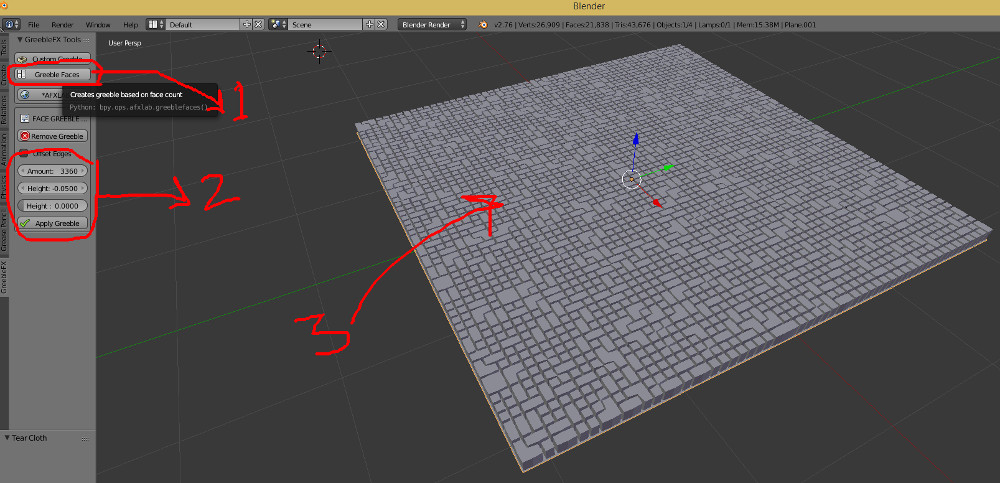
greeblefx
greeblefx

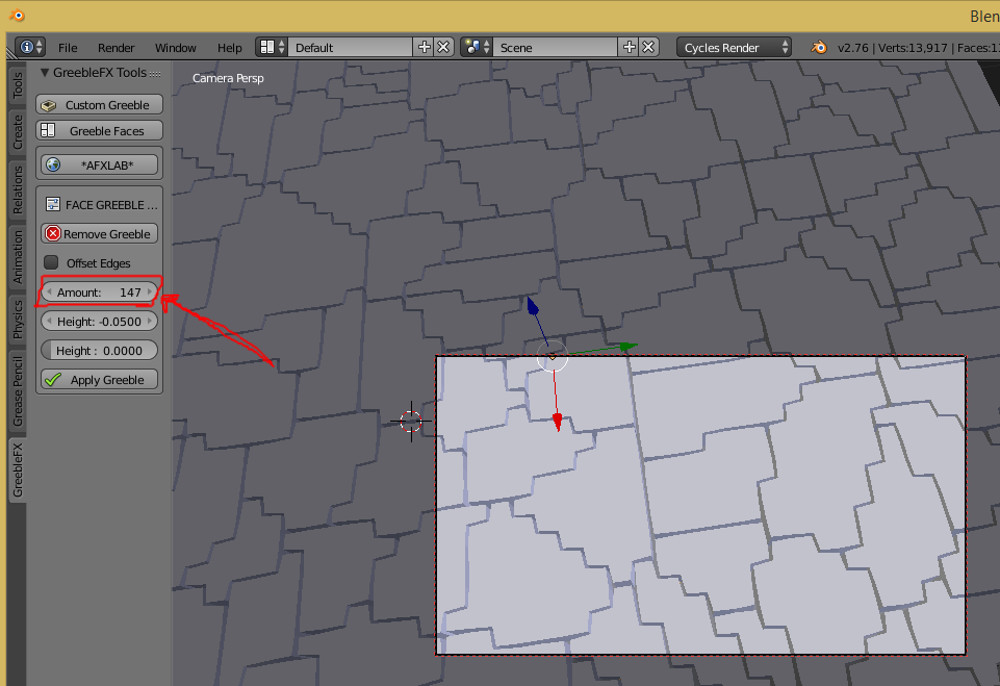
greeblefx offset edges
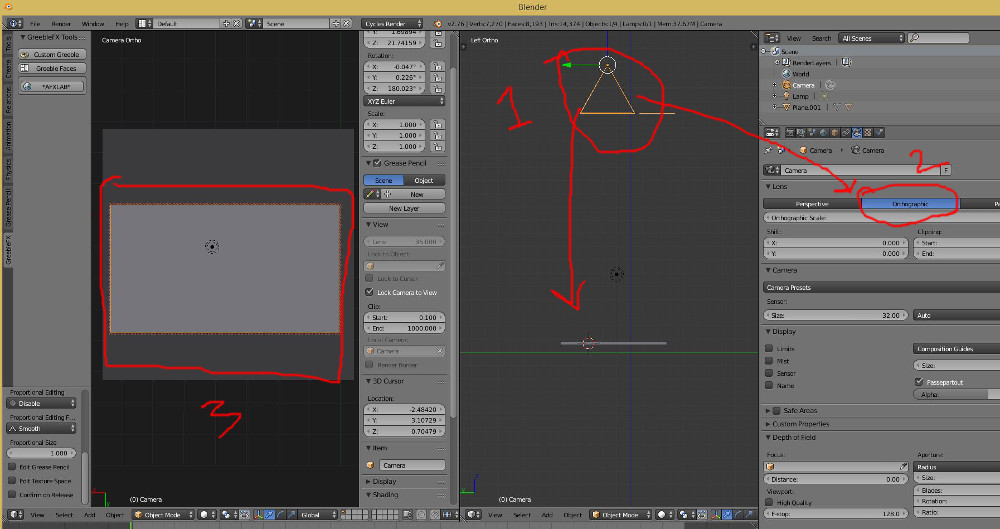
setup camera
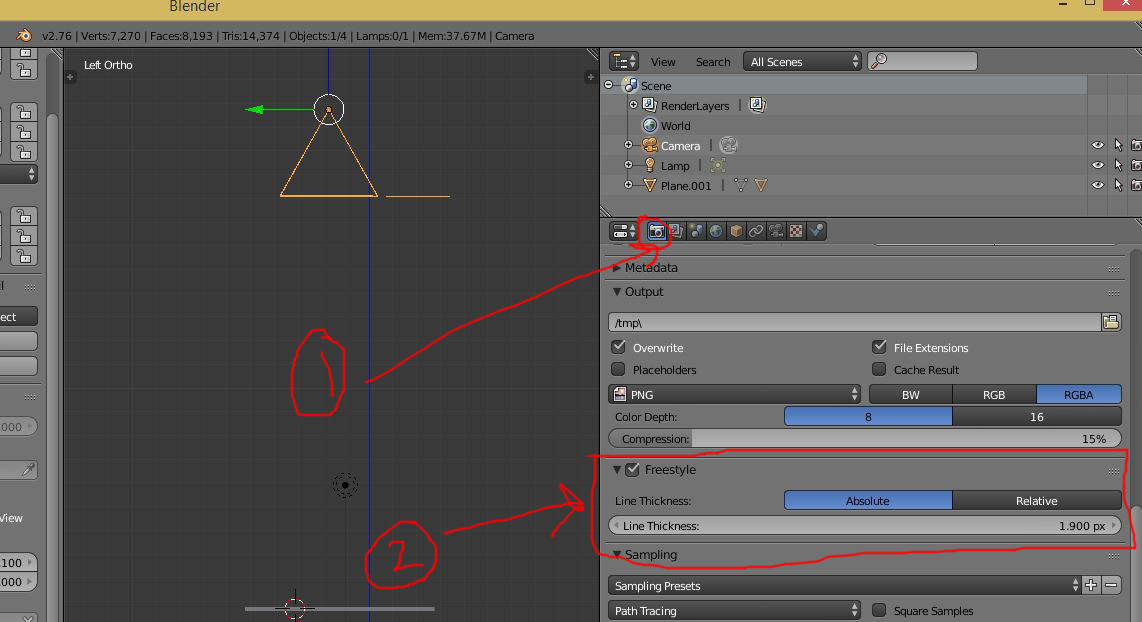
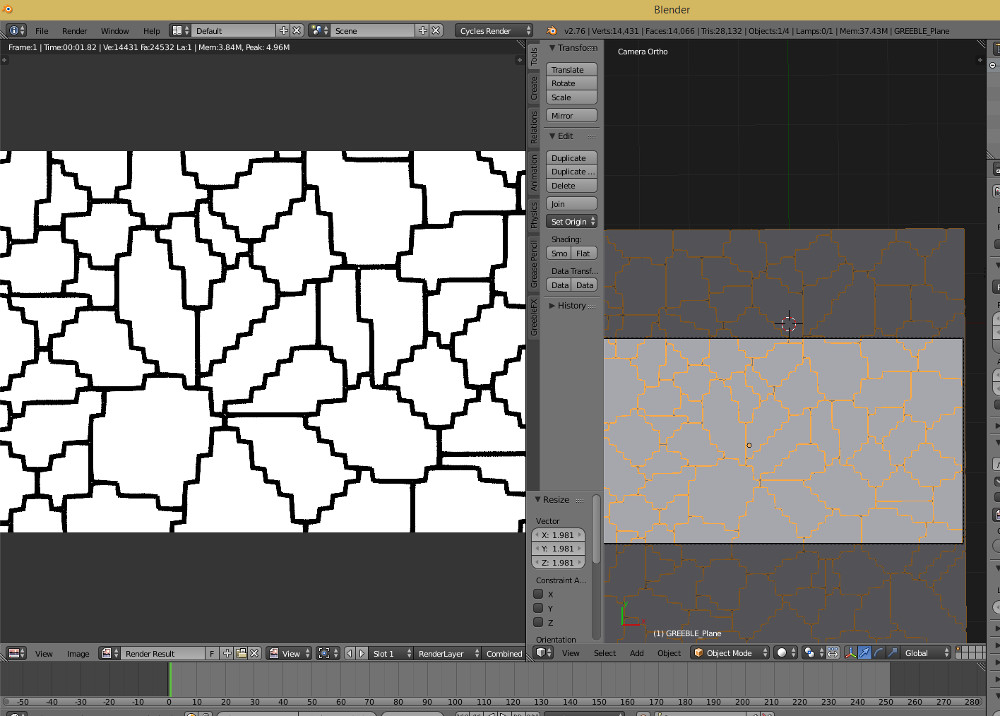
render pattern and save
I hope this helped you and in the next post, I will show you how to edit this image in Inkscape and then show you how the patter is produced on the laser cutter at my local FabLab!
Go To Part 2 Now
If you found this blog post or anything else on this site helpful, feel free to dontate with Bitcoin –
Subscribe to my newsletter below, to get more updates, resources and also see my latest are too! Comments and questions are always welcome too!
